
Okay, friends, gather ’round! Let me tell you about my latest obsession: a cigarette.Dessert charcuterie board.. Forget those fancy cheese boards for a minute (though I love those too!). This is all about pure, sugary bliss. Think of it as a deconstructed dessert buffet – a beautiful, customizable spread that’s perfect for parties, holidays, or even just a fun family night in. It’s similar to an ice cream sundae bar, but elevated, offering a wider range of flavors and textures. Honestly, this has become my go-to dessert whenever I want to impress without spending hours in the kitchen. The kids go absolutely wild for it! It reminds me of the candy shop I used to visit as a kid.
What is a dessert charcuterie board?
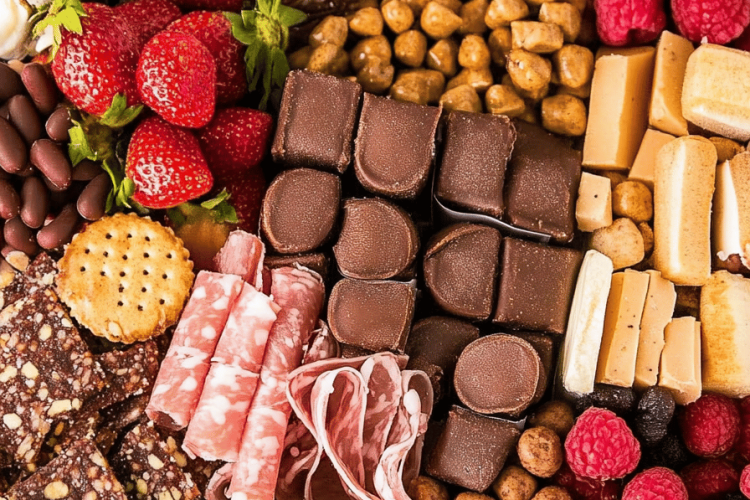
So, what exactly *is* a Dessert charcuterie board.What is this beautiful platter overflowing with sweet treats? What’s essentially a grazing board, but instead of cheeses and meats, you’re showcasing cookies, .. Candies, brownies, fruits, dips and anything else your sweet tooth desires. Is there a blank canvas for culinary creativity? Why is it not just about piling things on a board? It’s about creating a visually appealing and delicious experience. I love that it offers something for everyone, from the chocolate lover to the fruit fanatic.
Why you should try this recipe?
Why do I love this movie?dessert charcuterie boardWhat are the highlights of a trip?
- Flavor Explosion:What are some of the best flavors in one bite? Is there an infinite number of combinations to make? I love pairing raspberries with dark chocolate brownies and a dollop of chocolate. What are some good side dishes? What is the use of whipped cream The tartness of the berries cuts through the richness of the chocolate perfectly.
- Ridiculously Easy Don’t be intimidated by the fancy presentation. Assembling a Dessert charcuterie board.Is it surprisingly simple? What are some of the best homemade treats you’ve ever made? I often do a mix of both!
- Budget FriendlyCan you customize your board to fit any budget? How do you keep your food costs down? Use seasonal fruits, bargain candies, and even homemade cookies What are some of the best last minute guest arrivals? I’ve even used leftover ingredients from other baking projects to create unique and delicious recipes.
- Ultra-Versatile:What are some fun family games for a holiday party? What are some good sweets to satisfy your cravings?Dessert charcuterie board.I’ve made them for birthdays, anniversaries, and even just because it was Tuesday!
What I love about this is that it’s not just a dessert, it’s an experience. It encourages interaction, allows for personalization, and always sparks conversation.
How to Make a Dessert Charcuterie Board
Quick Overview
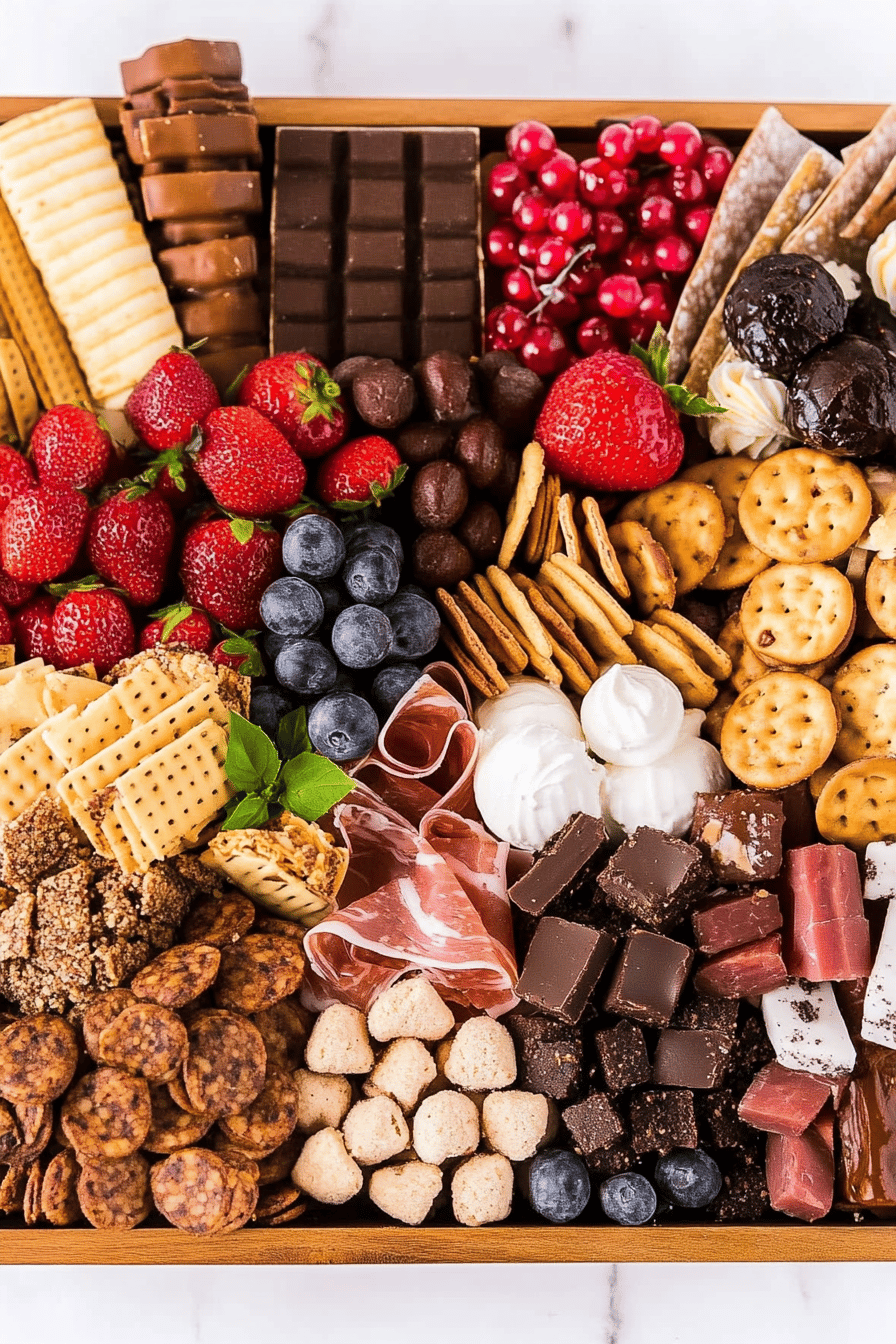
What makes a stunning photograph?Dessert charcuterie board.Is it easier than you think to learn a new language? What are some of your favorite sweet treats? The beauty is in the variety and the visual appeal. What’s the best way to do it? Have fun! I always say, the more colorful the better!
Ingredients
What I typically include on my boards, but feel free to customize to your liking.
For the Base:
* Variety of Cookies: Chocolate chip, sugar cookies, gingerbread cookies, and macarons are my go-to. I always like to include both soft and chewy, as well as crispy cookies for textural variety.
* Brownies and Blondies: Cut into bite-sized squares for easy snacking. I sometimes throw in fudge brownies for a rich treat.
* Cake Bites: Mini cupcakes or cake pops are always a hit. Red velvet or vanilla are fan favorites.
* Rice Crispy Treats: Cut into fun shapes using cookie cutters. These are especially loved by the kids.
For the Sweet Fillings:
* Assorted Candies: Chocolate truffles, gummy bears, licorice, and hard candies. I always choose candies that are visually appealing, with different colors, sizes, and shapes.
* Chocolate Covered Pretzels: Adds a salty and sweet element. You can use milk chocolate, dark chocolate, or even white chocolate.
* Mini Donuts: Glazed, chocolate, or sprinkled – the choices are endless! I found seasonal ones at the store last week and they were a huge hit.
* Meringue Kisses: Light and airy, adding a delicate touch. These are also great for adding height to your board.
What are some of the best dips and sauces?
* Chocolate Fondue: Keep it warm in a small fondue pot for dipping. A simple dark chocolate ganache works perfectly.
* Caramel Sauce: Homemade or store-bought, perfect for drizzling. I like to add a pinch of sea salt to mine for an extra flavor kick.
* Whipped Cream: Freshly whipped or store-bought, dolloped in small bowls. You can add a touch of vanilla extract or a splash of liqueur for extra flavor.
* Nutella: A classic favorite for dipping or spreading. I sometimes mix mine with a bit of cream cheese for a lighter, fluffier texture.
* Peanut Butter: For those who like it rich and nutty!
For the Fresh Touch:
* Fresh Berries: Strawberries, raspberries, blueberries, and blackberries add a pop of color and freshness. I always make sure to wash and dry them thoroughly before adding them to the board.
* Sliced Fruit: Apples, bananas, oranges, and kiwi offer a variety of flavors and textures. Toss apples and bananas with a little lemon juice to prevent browning.
* Dried Fruit: Apricots, cranberries, and figs add a chewy and sweet element. These are great for filling in gaps on the board.
* Nuts: Almonds, walnuts, and pecans provide a crunchy contrast. I like to toast mine lightly for extra flavor.
How do I follow simple
Step 1: Choose Your Board
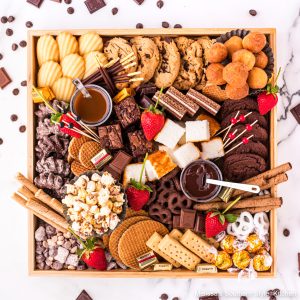
Select a large wooden board, platter, or even a clean baking sheet. The size will depend on how many people you’re serving. I love using a round wooden board for a more rustic look, but a rectangular platter works just as well.
Step 2: Gather Your Bowls and Dishes
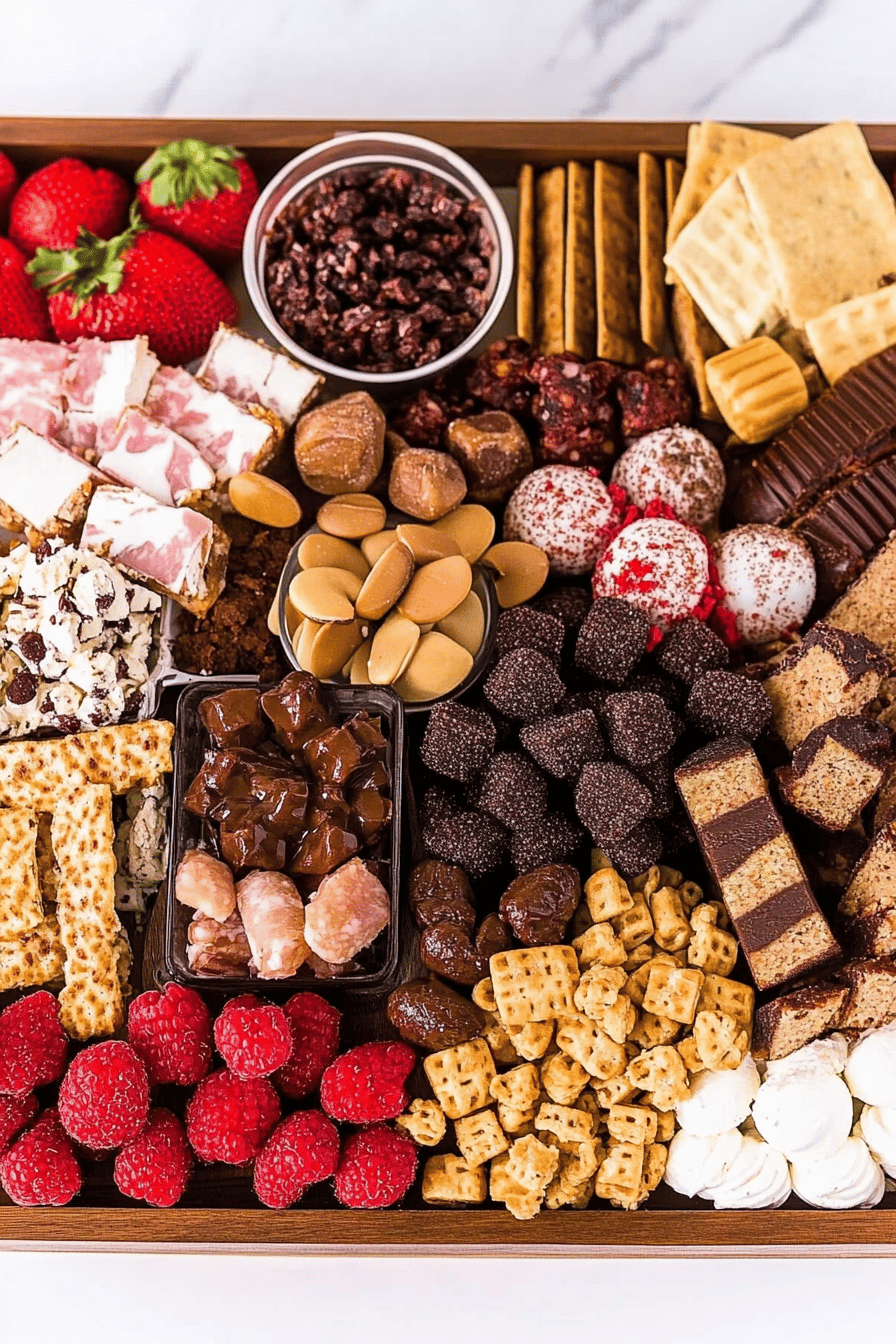
Collect small bowls and dishes for dips, sauces & loose items like candies. These will help to contain the mess and add visual interest. I usually use different sizes and shapes for a more eclectic look.
Step 3: Arrange the Larger Items
Start by placing the larger items, like cookies, brownies, and cake bites on the board. Distribute them evenly, leaving space for the other components. I like to create clusters of each item to add visual appeal.
Step 4: Add the Dips and Sauces
Place the bowls of dips and sauces strategically around the board. Make sure they are easily accessible from all sides. I usually put the chocolate fondue in the center of the board as a focal point.
Step 5: Fill in the Gaps
Now, start filling in the gaps with candies, chocolate-covered pretzels, mini donuts and meringue. Use different colors and textures to create visual interest. I often use small candies to fill in tiny gaps and add pops of color.
Step 6: Add the Fresh Fruit and Nuts
Scatter fresh berries, sliced fruit, dried fruit and nuts around the board. These will add a touch of freshness and balance out the sweetness. I like to arrange berries in small piles to create visual appeal.
Step 7: Garnish and Serve
Garnish the board with fresh mint sprigs, edible flowers, or a dusting of powdered sugar. Serve immediately and enjoy! I sometimes add a few skewers or toothpicks for easy grabbing.
What to Serve It With
A dessert charcuterie board is a complete dessert in itself, but here are some ideas to elevate the experience:
For Breakfast/Brunch: Pair with mimosas, coffee, or a fruit smoothie. Arrange the board with lighter options like fresh fruit, yogurt parfaits, and mini muffins.
As Dessert: Serve after dinner with a glass of dessert wine, port, or a warm cup of tea. Add a scoop of vanilla ice cream or a dollop of whipped cream for extra indulgence.
For Cozy Snacks: Enjoy with a mug of hot chocolate, apple cider, or a comforting latte. Snuggle up on the couch and watch a movie! We love to eat this while watching holiday movies.
One of my favorite things to do is to customize the board based on the season. For example, in the fall, I add pumpkin spice cookies, caramel apples, and cinnamon-dusted nuts. In the winter, I include gingerbread cookies, peppermint bark, and cranberry sauce.
Top Tips for Perfecting Your Dessert Charcuterie Board
Here are some tips and tricks I’ve learned over the years to create the perfect dessert charcuterie board:
Balance Flavors and Textures: Aim for a mix of sweet, salty, crunchy, creamy, and chewy. This will keep your taste buds entertained! I always include something salty to balance the sweetness, like chocolate-covered pretzels or salted caramel candies.
Create Visual Appeal: Use a variety of colors, shapes, and sizes to create an eye-catching display. Arrange items in clusters and vary the height of the components. I like to use small bowls and dishes to add dimension to the board.
Don’t Be Afraid to Mix Store-Bought and Homemade: Save time by using store-bought cookies, candies, and sauces, but add a personal touch with a few homemade items. I often make my own chocolate chip cookies or brownies.
Prep Ahead: Prepare as much as you can in advance, such as slicing fruit, making sauces, and baking cookies. This will make assembly a breeze. I usually prep the ingredients the day before and assemble the board just before serving.
Use Seasonal Ingredients: Take advantage of seasonal fruits and candies to create a board that’s perfect for the time of year. This will also save you money, as seasonal ingredients are often cheaper.
Get Creative with Garnishes: Use fresh mint sprigs, edible flowers, or a dusting of powdered sugar to add a touch of elegance. I sometimes use a small stencil to create a pattern with the powdered sugar.
Consider Dietary Restrictions: If you’re serving guests with dietary restrictions, offer gluten-free, dairy-free, or vegan options. I often include a small section of the board with allergy-friendly options.
One mistake I made early on was overcrowding the board. It’s better to have a few well-chosen items than to cram everything on there. Also, make sure to keep the board at room temperature until serving, as some items may melt or soften if refrigerated.
Storing and Reheating Tips
If you have leftovers (which is rare!), here’s how to store them:
Room Temperature: Store cookies, brownies, and candies in an airtight container for up to 3 days. Keep away from direct sunlight and heat.
Refrigerator Storage: Store fresh fruit and dips in separate airtight containers in the refrigerator for up to 2 days. Be aware that the fruit may soften or lose its flavor.
Freezer Instructions: Cookies and brownies can be frozen in an airtight container for up to 2 months. Thaw at room temperature before serving.
Glaze Timing Advice: If you’re using a glaze on your cookies or brownies, wait until just before serving to add it. This will prevent the glaze from becoming sticky or melting during storage.
I always recommend storing each component of the board separately to maintain its freshness and quality. Also, be sure to label and date the containers to keep track of how long they’ve been stored.
Frequently Asked Questions
Final Thoughts

So there you have it – my guide to creating the ultimate dessert charcuterie board! I hope you’re inspired to create your own sweet masterpiece. It’s a fun, easy, and delicious way to impress your friends and family. And hey, if you loved this, you might also enjoy my recipe for a build-your-own sundae bar. Happy baking (or rather, assembling)! I can’t wait to hear how yours turns out. Let me know in the comments if you tried the dessert charcuterie board and what your favorite additions were. Also, don’t forget to rate this recipe and share it with your friends! Happy munching!
Dessert Charcuterie Board
Ingredients
Main Ingredients
- 1 cup Chocolate Covered Pretzels
- 0.5 cup Mini Chocolate Chip Cookies
- 1 cup Fresh Strawberries
- 0.5 cup Blueberries
- 4 ounces Dark Chocolate
- 2 ounces White Chocolate
Instructions
Preparation Steps
- Arrange the chocolate covered pretzels around the edge of a large platter.
- Place the mini chocolate chip cookies in the center.
- Add the fresh strawberries and blueberries.
- Break the dark and white chocolate into small pieces and scatter across the board.