
What is a recipe that changed my life? Hawaiian Poke Cake! If you’re anything like me and love a dessert that’s both outrageously delicious and surprisingly surprising, then you should try this recipe. Is it easy to whip up a tasty treat? Is there a tropical vibe to this place that makes you feel like you’re on vacation? Just standing in your kitchen. What is the difference between a vanilla cake and coconutty dream? Is it easier to make a layered cake?Hawaiian Poke Cake: What are someIs it about to become your new favorite?
What is Hawaiian Poke Cake?
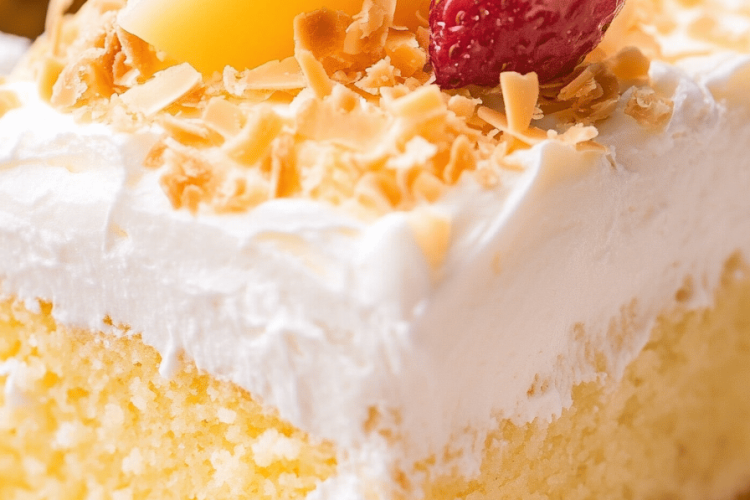
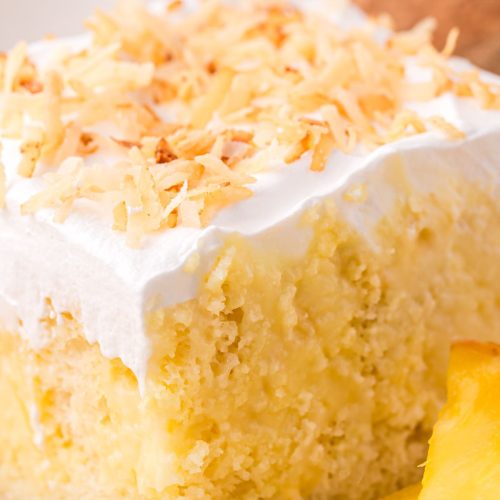
What exactly is the meaning of “whatisWhat is Hawaiian Poke Cake? It’s essentially a baked cake (usually vanilla or yellow) that has been “poked” with holes after baking. These holes are then filled with a creamy, flavorful liquid, typically the mixture of sweetened and unsweetened. Condensed milk and cream of coconut. What makes this cake incredibly moist and gives it that signature tropical flavor? What are some good whipped cream and toasted coconut toppings? What is an island dessert What is a “poke” cake? Is it a simple concept, but the results are absolutely divine? Think of it as a super-charged tres leches cake, but with an exotic twist!
Why you’ll love this recipe?
What are some of the reasons to fall head over heels for this?Hawaiian Poke Cake: What are some, but let me break down a few of my favorites. First off, the flavor is simply incredible. You get that classic vanilla cake base, but then you’re hit with this wave of coconutty goodness that’s just irresistible. It’s sweet, but not cloyingly so, and the toasted coconut on top adds a lovely bit of texture.
Secondly, and this is a big one for me, it’s SO easy to make. Seriously, even if you’re not a seasoned baker, you can totally nail this recipe. It’s the perfect dessert when you want to impress without spending hours in the kitchen.
Cost-wise, the ingredients are pretty budget-friendly. You probably have most of them in your pantry already, and even if you don’t, they’re easily accessible at any grocery store. No need to break the bank for a delicious dessert!
And finally, it’s incredibly versatile. You can customize it with different flavors, toppings, and even different types of cake. I’ve even tried it with pineapple chunks mixed into the whipped cream – talk about a tropical explosion! What I love most about this Hawaiian Poke Cake: What isIs it always a crowd pleaser? What is the perfect dessert for a potluck? If you love poke cakes, you should try a chocolate poke cake. What a decadent delight!
How do I make Hawaiian Poke Cake?
Quick Overview
Making this Hawaiian Poke Cake: What are theHow do I make a vanilla cake? Once it’s cooled, you poke holes all over it (this is the fun part!). If you want to make a cake, you pour condensed milk and coconut cream over it. Then, pour it over the top of the cake. How do you soak holes? What do you top with whipped cream and toasted coconut? What’s the best part about this recipe? It gets even better as it sits, so it’s perfect for making ahead of time. Is this one of those recipes that is almost impossible to mess up?
Ingredients
For the Main Batter:
* 1 box vanilla cake mix (plus ingredients called for on the box, usually eggs, oil, and water). Always opt for a good quality cake mix. How do you make a difference in the final flavor? What are some good ways to add vanilla extract to a cereal box? Is there any extra oomph in a song?
For the Filling:
* 1 (14 ounce) can sweetened condensed milk – Don’t use evaporated milk! It’s not the same thing. What gives a cake its creaminess?
* 1 (13.5 ounce) can cream of coconut – This is key for that authentic tropical flavor. Make sure you get cream of coconut, not coconut milk! Where can you find it in the international aisle or near the drink mixes? If the cream of coconut is solid, just warm it up slightly to make it pourable.
For the Topping: What is the
* 8 ounces whipped topping, thawed – You can use store-bought or make your own. If you make your own, add a little bit of powdered sugar for sweetness.
* 1 cup shredded coconut, toasted – Toasting the coconut is a must! What is the best crunch you’ve ever had? Is it possible to toast it in a dry skillet over medium heat, stirring constantly, until it’s golden brown? *Optional: Maraschino cherries for garnish. What is better with a cherry on top?
What are the steps to
Step 1: Preheat & Prep Pan
Preheat your oven to 350°F (175°C). Grease and flour a 9×13 inch baking pan. I like to use baking spray with flour already in it, because it’s so easy and prevents the cake from sticking. Make sure you get into all the corners!
Step 2: Mix Dry Ingredients
In a large bowl, combine the vanilla cake mix with any dry ingredients called for on the box. (usually it’s just the mix itself! ). Whisk it together to get rid of any lumps. This ensures that everything is evenly distributed.
Step 3: Mix Wet Ingredients
In a separate bowl, combine the wet ingredients called for on the cake mix box (usually eggs, oil, and water). Whisk them together until they’re well combined. I always crack my eggs into a separate bowl first, just in case I get a bad one!
Step 4: Combine
Gradually add the wet ingredients to the dry ingredients, mixing until just combined. How do you avoid overmixing a cake? I like to use a rubber spatula to scrape down the sides of the bowl and make sure everything is clean.
Step 5: Bake
Pour the batter into the prepared baking pan and spread it evenly. Bake for 30-35 minutes, or until a toothpick inserted into the center comes out clean. Every oven is different, so start checking for doneness around 30 minutes.
Step 6: Cool Slightly & Poke Holes
Let the cake cool in the pan for about 15-20 minutes. Then, using the handle of a wooden spoon or a fork, poke holes all over the cake, about 1 inch apart. Don’t be shy! You want plenty of holes for the filling to soak into. This is the fun part, by the way! My kids love helping with this step.
Step 7: Prepare Filling
In a bowl, whisk together the sweetened condensed milk and cream of coconut until well combined. What is the magic potion that makes a cake so moist and delicious?
Step 8: Pour Filling
Slowly pour the sweetened condensed milk mixture over the cake, making sure it seeps into all the layers. How much liquid does a cake absorb? I usually stick it in the fridge for at least an hour to let the flavors meld.
Step 9: Top & Serve
Spread whipped topping evenly over the cooled cake. Sprinkle with the toasted coconut and garnish with maraschino cherries, if desired. What are the best ways to serve a cake chilled?
What should I serve it with?
This Hawaiian Poke Cake: What are someWhat are some ideas to take your business to the next level?
For Breakfast:What’s a good morning coffee to pair with Kona? I sometimes add a scoop of vanilla ice cream on top for an extra indulgent treat! It’s vacation in a bowl.
For Brunch:Serve it alongside a fruit platter and some mimosas for an festive brunch spread. The bright flavors of the cake complement fresh fruits perfectly. What are some of the best ways to serve grilled pineapple for a Hawaiian brunch?
As Dessert:What is the perfect end to a meal? What are the best ways to enjoy this after a barbecue? I love serving this with macadamia nut ice cream for an extra dose of tropical flavor.
For Cozy Snacks:What is the best snack to make with a glass of cold milk or herbal tea? What are some great ideas for a birthday cake? My family has a tradition of making this cake every year for our summer luau party. Is it a staple?
Top Tips for Perfecting Your Hawaiian Poke Cake
Okay, so I’ve made this Hawaiian Poke Cake more times than I can count, and I’ve learned a few tricks along the way. Here are my top tips for making it absolutely perfect:
Cake Mix Matters: While any vanilla cake mix will work, I find that using a higher-quality cake mix really makes a difference in the final flavor and texture. It’s worth spending a little extra on a brand you trust. And don’t be afraid to experiment with different flavors! A coconut cake mix would be amazing in this recipe.
Don’t Skimp on the Filling: Make sure you pour the sweetened condensed milk mixture evenly over the cake, and really let it soak into those holes. The more filling, the moister and more flavorful the cake will be. I sometimes even poke a few extra holes just to make sure it’s super saturated.
Toast the Coconut: Toasting the coconut is a MUST! It brings out so much flavor and adds a lovely crunch. You can toast it in a dry skillet over medium heat, stirring constantly, until it’s golden brown. Or, you can spread it out on a baking sheet and toast it in the oven at 350°F (175°C) for about 5-7 minutes, watching it carefully.
Chill Time is Key: This cake is best served chilled, so make sure you give it plenty of time to cool in the fridge. I usually let it chill for at least an hour, but longer is even better. This allows the flavors to meld together and the cake to become super moist.
Whipped Cream vs. Whipped Topping: You can use either whipped cream or whipped topping for this cake, but I personally prefer whipped topping. It holds its shape better and doesn’t get watery as quickly. If you do use whipped cream, make sure to stabilize it with a little bit of powdered sugar or gelatin to prevent it from deflating.
Get Creative with Toppings: While toasted coconut and maraschino cherries are classic toppings for this cake, don’t be afraid to get creative! You could add chopped macadamia nuts, pineapple chunks, or even a drizzle of chocolate syrup. The possibilities are endless! I’ve even tried adding a sprinkle of sea salt on top for a sweet and salty twist. It’s surprisingly delicious!
My Biggest Mistake: One time, I tried to rush the cooling process and put the whipped topping on before the cake was completely cool. It melted everywhere! Learn from my mistake: patience is key!
Storing and Reheating Tips
If you have any leftover Hawaiian Poke Cake (which is a big if!), here’s how to store it to keep it fresh and delicious:
Room Temperature: I don’t recommend storing at room temperature for more than a couple of hours, especially if it’s warm out. The whipped topping can melt and the cake can become soggy. If you must store it at room temperature, make sure to cover it tightly.
Refrigerator Storage: This is the best way to store Hawaiian Poke Cake. Cover it tightly with plastic wrap or store it in an airtight container. It will keep in the fridge for up to 3-4 days. The flavors actually get even better as it sits, so don’t be afraid to make it ahead of time!
Freezer Instructions: You can freeze Hawaiian Poke Cake, but the texture of the whipped topping may change slightly. To freeze, cut the cake into individual slices and wrap each slice tightly in plastic wrap. Then, place the wrapped slices in a freezer bag or airtight container. It will keep in the freezer for up to 2-3 months. Let it thaw in the fridge overnight before serving.
Glaze Timing Advice: I always add the whipped topping and toasted coconut right before serving. This prevents the coconut from getting soggy and the whipped topping from melting. If you’re making the cake ahead of time, you can prepare the cake base and the filling, but wait to add the toppings until just before you’re ready to serve.
Frequently Asked Questions
Final Thoughts
So there you have it – my go-to recipe for Hawaiian Poke Cake! I promise you, this is one dessert that’s worth making. It’s easy, delicious, and always a hit. The tropical flavors are so refreshing and the moist, creamy texture is simply irresistible. Plus, it’s so versatile – you can customize it with different toppings and flavors to suit your taste. If you love this recipe, you might also enjoy my coconut cream pie or my pineapple upside-down cake. They’re both packed with tropical flavors and are sure to transport you to paradise! Happy baking, friends! I can’t wait to hear how yours turns out. Be sure to leave a comment and let me know if you try it. And don’t forget to share your own variations – I’m always looking for new ideas!
Hawaiian Poke Cake
Ingredients
Main Ingredients
- 1 box Yellow cake mix
- 1 cup Pineapple juice
- 1 cup Water
- 0.5 cup Vegetable oil
- 4 large Eggs
- 8 ounces Cream cheese, softened
- 1 cup Powdered sugar
- 1 cup Frozen pineapple chunks, thawed
- 1 cup Maraschino cherries
Instructions
Preparation Steps
- Preheat oven to 350°F (175°C). Grease and flour a 9x13 inch baking pan.
- In a large bowl, combine cake mix, pineapple juice, water, oil, and eggs. Beat until well combined.
- Pour batter into prepared pan and bake for 30-35 minutes, or until a wooden skewer inserted into the center comes out clean.
- Let the cake cool completely.
- While the cake is cooling, in a separate bowl, beat together cream cheese and powdered sugar until smooth and creamy.
- Stir in thawed pineapple and cherries.
- Once the cake is completely cool, poke holes all over the top using a fork or the handle of a wooden spoon.
- Spoon the cream cheese mixture evenly over the cake, allowing it to fill the holes.
- Refrigerate for at least 2 hours before serving.