What are some of the best ghost brownies? What are some of the best spooky episodes ever? When I was little, my mom always made these cutout sugar cookies with the royal icing. I remember her making them every day. That took forever. And honestly, they were kind of dry. How do I make brownies? If you’re looking for something that’s both festive AND delicious – and doesn’t require hours of time, then look no further. Decorating – these are it. What are some of the best Halloween sugar cookies? What is a spooky
What is a ghost brownie?
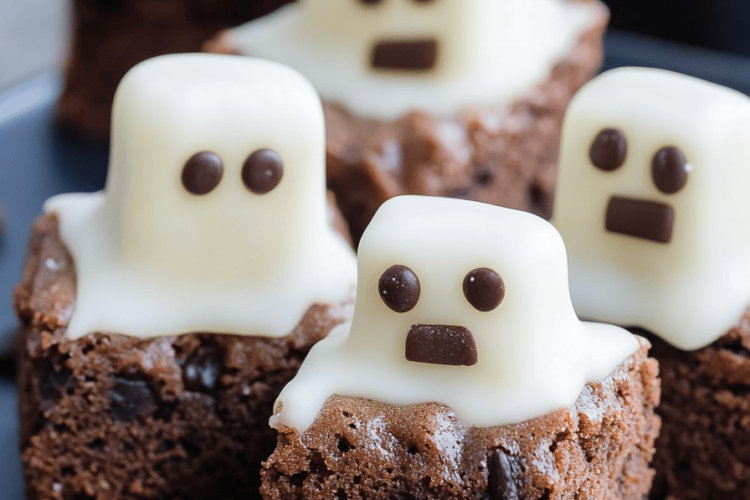
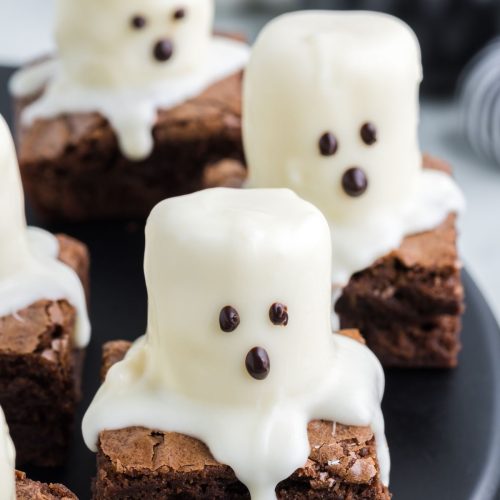
Halloween Ghost Brownies are your favorite fudgy brownies. What is a ghostly, festive Is it a rich dark chocolate brownie base topped with creamy white chocolate? Is there a glaze that is shaped like ghosts? What is the name? The glaze creates these cute little ghosts that make them perfect for Halloween parties, spooky. What is a good movie night to celebrate the season? What are some of the best things to make and how do you decorate them? What are some of the best spooky chocolates you have ever had?
Why you’ll love this recipe?
Okay, where do I even start? The best part, hands down, is the fudgy, intensely chocolatey flavor. It’s like a warm hug in every bite. I always use a good quality dark chocolate because it makes all the difference. Seriously, it’s worth the splurge!
What I love about this recipe is how easy it is to make. What is the ghost part? How cute is drizzling it in a cute way? Is it so simple, my kids actually help me make them (which, okay, is messy, but also makes it even more fun). What are some of the best Halloween treats?
What makes these brownies different from other Halloween desserts? Why are cookies not cookies? I love a good cookie, but sometimes you just crave that dense, fudgy texture of …………………….. Plus, they’re incredibly versatile. What are some great ways to add peanut butter and chocolate chips to a recipe? What are the possibilities? Honestly, I’ve made these so many times, and they never fail to impress. I even made a batch for my neighbor last year, and she said they were the best brownies she’d ever made. I knew I had to share this recipe with everyone!
How do I make a ghost brownie?
Quick Overview
Making these Halloween Ghost Brownies is easier than you think! You’ll start by whipping up a batch of fudgy brownies (from scratch, of course, because that’s always the best!). While they’re baking and cooling, you’ll melt some white chocolate and get ready to create your spooky ghosts. Once the brownies are cool, you’ll drizzle the melted chocolate in a ghostly shape and let it set. That’s it! It’s surprisingly simple and totally rewarding when you see those adorable ghost brownies come to life.
Ingredients
For the Main Batter:
• 1 cup (2 sticks) unsalted butter, melted: I always use good quality butter for the best flavor. Make sure it’s melted completely and slightly cooled.
• 2 cups granulated sugar: This gives the brownies their sweetness and chewy texture.
• 1 cup unsweetened cocoa powder: Use a good quality chocolate! Dutch-processed cocoa gives a richer, darker flavor, but regular works too.
• 1 teaspoon salt: Enhances chocolate flavor and balances the sweetness.
• 1 teaspoon baking powder: Helps the brownies rise slightly and gives them a nice texture.
• 1 teaspoon vanilla extract: Adds a warm, sweet flavor. I love using pure vanilla extract for the best taste.
• 4 large eggs: These bind the ingredients together and give the brownies structure. Make sure they’re at room temperature.
• 1 cup all-purpose flour: This provides structure to the brownies. Be careful not to overmix!
For the Glaze:
Is Ghirardelli or Baker’s a good brand for melting chocolate?
• 2 tablespoons shortening: This helps the white chocolate melt smoothly and prevents it from seizing.
For the Ghostly Eyes: A Novel.
• Mini chocolate chips or black decorating gel: For the cute little ghost eyes! Can you use melted dark chocolate?
What are the step-
Step 1: Preheat & Prep Pan
Preheat your oven to 350°F (175°C). Grease and flour a 9×13 inch baking pan. I always line the pan with parchment paper too, leaving an overhang on the sides – it makes it so easy to lift the brownies out later! This little trick saves so much time and frustration.
Step 2: Mix Dry Ingredients
In a large bowl, whisk together the sugar, cocoa powder, salt, and baking powder. Make sure everything is well combined, so there are no lumps of cocoa powder.
Step 3: Mix Wet Ingredients
In a separate bowl, whisk together the melted butter, vanilla extract, and eggs until smooth. I like to make sure the butter is slightly cooled before adding the eggs so they don’t cook.
Step 4: Combine
Pour the wet ingredients into the dry ingredients and stir until just combined. Be careful not to overmix! Overmixing develops the gluten in the flour, which can make the brownies tough. I usually stop stirring when there are still a few streaks of flour visible.
Step 5: Bake
Pour the batter into the prepared pan and spread it evenly. Bake for 25-30 minutes, or until a toothpick inserted into the center comes out with moist crumbs. I always start checking them around 25 minutes because ovens can vary.
Step 6: Cool Completely
Let the brownies cool completely in the pan before frosting. This is important! If you try to frost them while they’re still warm, the glaze will melt. I usually let them cool for at least an hour or two.
Step 7: Prepare the Glaze
In a microwave safe bowl, combine the white chocolate chips and shortening. Set aside. Microwave in 30-second intervals, stirring in between, until melted and smooth. Do not overheat chocolate, or it will seize.
Step 8: Create the Ghosts
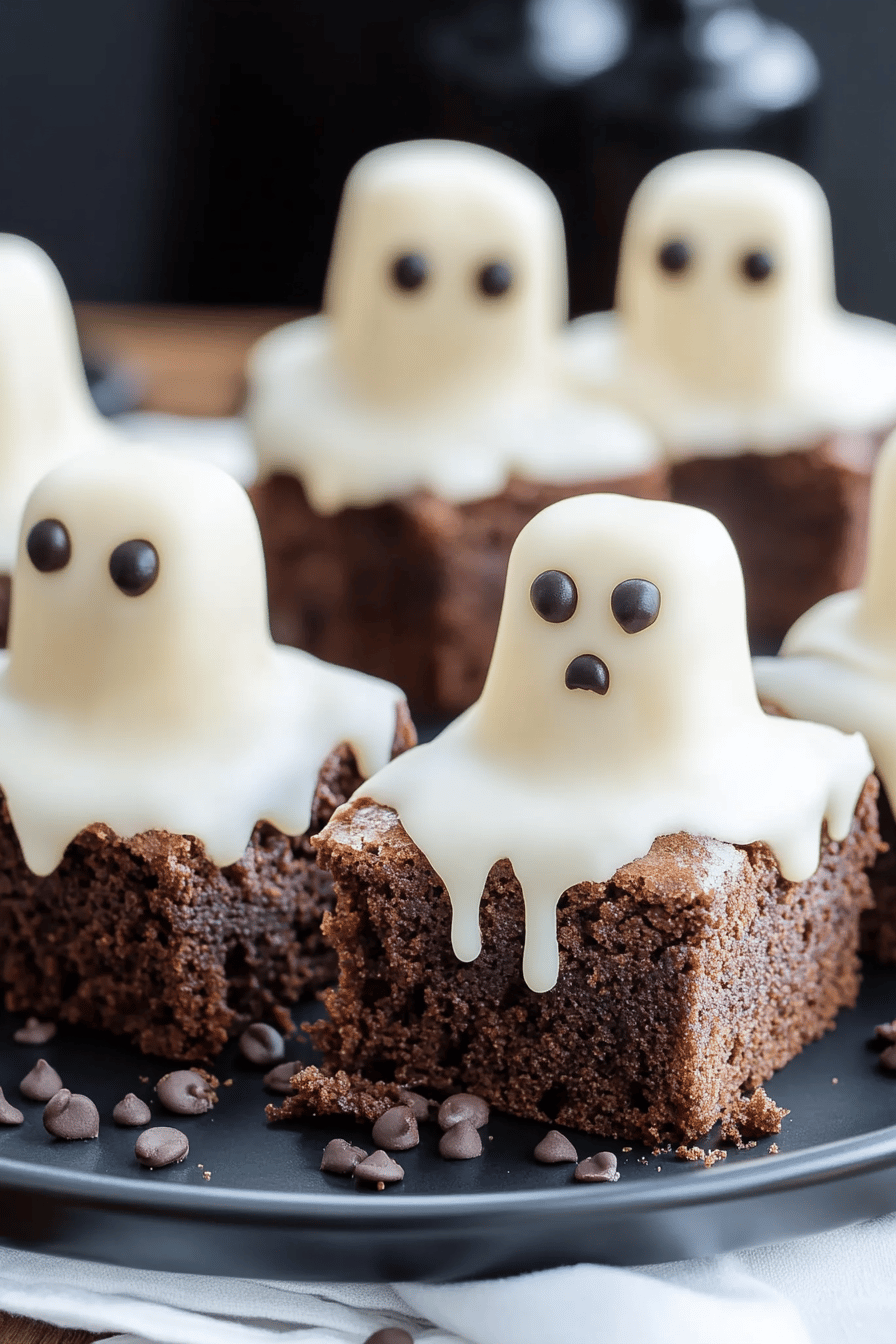
Once the brownies are completely cool, drizzle the melted white chocolate over them in a ghost-like shape. You can use a spoon, a fork, or a piping bag for this. I find that a fork works best for creating those wispy ghost tails. Get creative! Don’t worry if they’re not perfect – that’s part of the charm.
Step 9: Add Eyes
While the white chocolate is still wet, add mini chocolate chips or black decorating gel for the eyes. Let the glaze set completely before slicing and serving.
Step 10: Slice & Serve
Once the glaze is set, slice the brownies into squares and serve. These are best enjoyed fresh, but can also be stored in an airtight container at room temperature. Temperature for up to 3 days.
What should I serve it with?
What are some good ghost brownies for Halloween?
For a Halloween Party:Arrange the brownies on a spooky platter with other Halloween treats like candy corn, gummy worms, and more. What are some of the best pumpkin cookies Add dry ice for a smoky effect!
For a Movie Night:Serve brownies with ice cream and chocolate sauce. Pair them with a spooky movie like “Hocus Pocu” or “The Nightmare Before Christmas.”
What is a good cozy snack? Enjoy a brownie with a warm cup of coffee or hot chocolate on a chilly evening. This is my personal favorite way to enjoy them!
For a Kid’s Party: Serve the brownies with a glass of milk or juice. Let the kids decorate their own brownies with extra sprinkles and candy eyes.
My family loves to have these with a big glass of milk. It’s just the perfect combination!
Top Tips for Perfecting Your Halloween Ghost Brownies
Okay, after making these countless times, I’ve picked up a few tricks that can help you perfect your Halloween Ghost Brownies:
Use Good Quality Chocolate: I can’t stress this enough! The quality of your chocolate will directly impact the flavor of your brownies. Splurge on a good quality dark chocolate for the batter and white chocolate for the glaze.
Don’t Overmix the Batter: Overmixing develops the gluten in the flour, which can make the brownies tough. Mix the wet and dry ingredients until just combined.
Use Room Temperature Eggs: Room temperature eggs will incorporate more easily into the batter, resulting in a smoother texture.
Don’t Overbake: Overbaked brownies are dry and crumbly. Bake them until a toothpick inserted into the center comes out with moist crumbs.
Let the Brownies Cool Completely: This is crucial for getting a clean cut and preventing the glaze from melting.
Use Shortening in the Glaze: Shortening helps the white chocolate melt smoothly and prevents it from seizing. If you don’t have shortening, you can use coconut oil.
Get Creative with the Ghost Design: Don’t be afraid to get creative with your ghost design! You can use different sized spoons or piping bags to create different shapes and textures. I even tried using a star tip once and it made really cool, swirling ghost details.
Add a Pinch of Salt to the Glaze: This helps balance the sweetness of the white chocolate and enhances the flavor.
I also learned the hard way that if you’re using gel food coloring for the eyes, make sure it’s a very small amount! Too much can make the white chocolate seize up. A tiny dot is all you need!
Storing and Reheating Tips
Here’s how to keep your Halloween Ghost Brownies fresh and delicious:
Room Temperature: Store the brownies in an airtight container at room temperature for up to 3 days. Make sure they’re covered to prevent them from drying out.
Refrigerator Storage: For longer storage, you can keep them in the refrigerator for up to a week. Wrap them tightly in plastic wrap or store them in an airtight container to prevent them from absorbing odors.
Freezer Instructions: To freeze the brownies, wrap them individually in plastic wrap and then place them in a freezer-safe bag or container. They can be frozen for up to 2 months. Let them thaw at room temperature before serving.
Glaze Timing Advice: If you’re planning to freeze the brownies, it’s best to add the glaze after they’ve thawed. This will prevent the glaze from cracking or becoming sticky.
Honestly, in my house, these rarely last more than a day, but it’s good to know how to store them properly!
Frequently Asked Questions
Final Thoughts

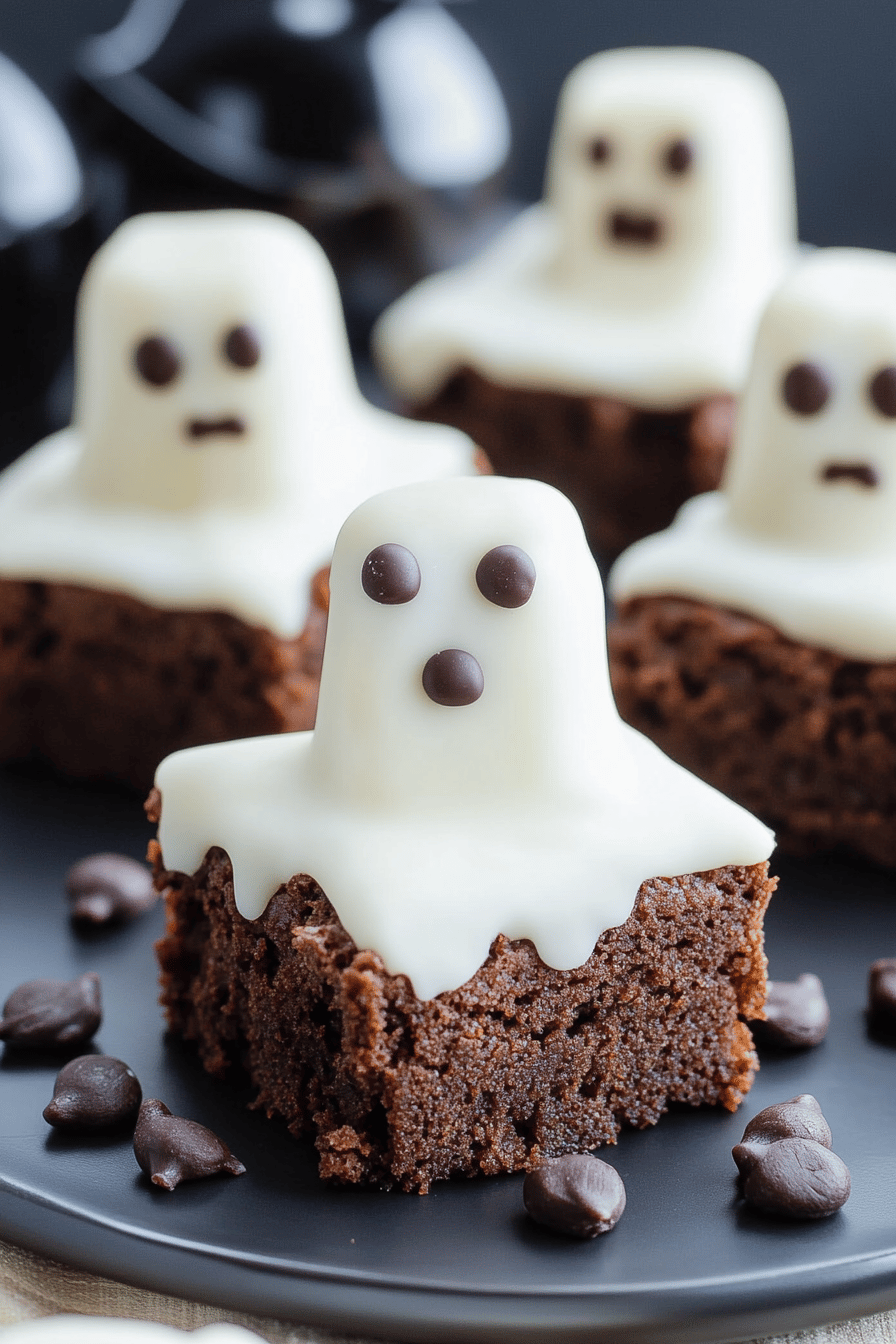
These Halloween Ghost Brownies are more than just a spooky treat; they’re a fun and delicious way to celebrate the season with family and friends. They’re easy to make, incredibly fudgy, and those little ghost faces just make everyone smile. If you’re looking for something a little different, try my Pumpkin Spice Blondies – they are a perfect pair with these brownies! I can’t wait to hear how yours turn out! Don’t forget to leave a comment and let me know if you try them, and if you have any fun variations of your own. Happy baking!
Halloween Ghost Brownies
Ingredients
Main Ingredients
- 1 cup unsweetened chocolate
- 1.5 cups granulated sugar
- 0.5 cup unsalted butter melted
- 4 large eggs
- 1 teaspoon vanilla extract
- 1 cup all-purpose flour
- 0.5 cup powdered sugar for dusting
- 2 cups mini marshmallows
Instructions
Preparation Steps
- Preheat oven to 350°F (175°C). Grease and flour a baking pan.
- Melt chocolate and butter together. Stir in sugar.
- Beat in eggs one at a time, then stir in vanilla.
- Gradually add flour and mix until just combined.
- Pour batter into prepared pan and bake for 25-30 minutes.
- Let cool completely. Dust with powdered sugar and add mini marshmallows for ghost eyes.